
First of all, we were split into groups and had to pick a setting, this was a random chance pick out of a bag. We picked the setting UK Dockyard, we then went and chose what roles/jobs we were going to do.
Jamie- Textures and management
Eoin- Asset Creation, organisation and Direction
Conner- Roof and floor plan
Kyrylo- Furniture and asset creation
Michael- asset creation and audio
After this, we decided on what the design should look like the assets we'd need and what sort of textures we roughly want. and drew out a rough plan on the whiteboard of what we want to do and who was going to create what assets.
*Update* This was the initial plan for the group but after a few days we realised that some people were in the wrong place when it came to certain things. the roles were redistributed to suit what peoples skill set was capable of.
My jobs/roles in this project are texturing, modelling, concept art and management.
Texturing: I have had to create textures for most of the assets, which meant finding textures and altering them to fit the desired effect.
Modelling: I have had to create models or alter models that have been provided.
Concept art: I chose to make the concept art within this project as everyone was busy making the assets, audio, and UI which meant I didn't really have any textures to make at the time.
Management: I have to make sure that the group stays on track and doesn't get distracted, it also means I have to help people when they need it.
The google doc was there to help people provide updates to what people have done and need to do it was also meant to let everyone in the group know what the process that had been taken to reach the final conclusion. Unfortunately, it was barely used by anyone myself included for two reasons the first being that I wasn't able to edit the doc until 3 weeks into the project and the second being that I didn't really know what I should put on the slide as I had lots of texture maps but nothing else. the only people who used it somewhat regularly was Eoin And Kyrylo.
*Update* I decided to add a few texture maps and explain how I came to the finished product
Reference Images


Hooks: hanger, 5. (2019). 5 X GWR- cast iron vintage old English Railway hat & coat hook hanger | Ironmongery World. [online] Ironmongeryworld.com. Available at: https://www.ironmongeryworld.com/5-x-gwr-cast-iron-vintage-old-english-railway-hat-coat-hook-hanger.html [Accessed 28 Feb. 2019].
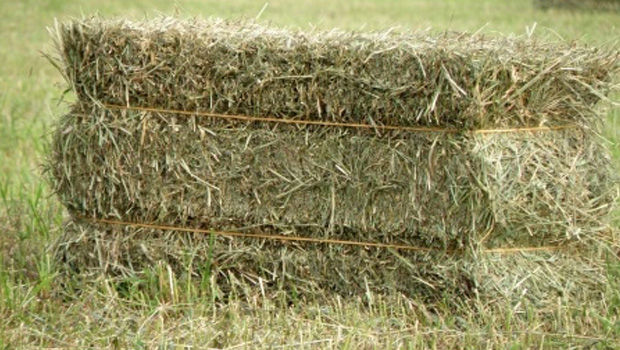
Hay bale: Bale, U. (2019). Unbranded USA Second Cut Timothy Hay Bale - MOOMOOPETS.SG Singapore's Online Pet Supplies Shop. [online] MOOMOOPETS.SG Singapore's Online Pet Supplies Shop. Available at: http://moomoopets.sg/mmp/home/5129-unbranded-usa-second-cut-timothy-hay-bale.html [Accessed 28 Feb. 2019].
Wheelbarrow: Second Life Marketplace. (2019). Check out this Second Life Marketplace Item!. [online] Available at: https://marketplace.secondlife.com/p/RE-Old-Sculpted-Wheelbarrow-Wheel-BarrowGardenDecorWestern/2199112?id=2199112&slug=RE-Old-Sculpted-Wheelbarrow-Wheel-BarrowGardenDecorWestern [Accessed 28 Feb. 2019].
Wicker Baskets: Store, W. (2019). Wicker Storage Baskets | Wicker Baskets UK. [online] Woods-furniture.co.uk. Available at: https://www.woods-furniture.co.uk/home-accessories/storage-baskets/c97 [Accessed 28 Feb. 2019].
Damaged floorboards: Pinterest. (2019). Broken floorboards | Horror: The Macabre Masterpiece | Pinterest | Horror and New board. [online] Available at: https://www.pinterest.co.uk/pin/320037117261626865/ [Accessed 28 Feb. 2019].
Crate: Crafts, K., Kits, C. and Pine, H. (2019). Hand Made Modern - Wooden Crate - Pine. [online] Intl.target.com. Available at: https://intl.target.com/p/hand-made-modern-wooden-crate-pine/-/A-16781461 [Accessed 1 Mar. 2019].
Structural beams: ukfilmlocation.com. (2019). South East London: Loft Studio With Wooden Floors And Exposed Beams For Filming. [online] Available at: https://ukfilmlocation.com/locations/south-east-london-loft-studio-with-wooden-floors-and-exposed-beams-for-filming-LON1343 [Accessed 1 Mar. 2019].
Red Dead Redemption 1/2:
Cates/boxes: Shacknews. (2018). All Amazing Inventions Cigarette Card locations in Red Dead Redemption 2. [online] Available at: https://www.shacknews.com/article/108244/all-amazing-inventions-cigarette-card-locations-in-red-dead-redemption-2 [Accessed 1 Mar. 2019].
Storefront: Red Bull. (2019). 8 skills you'll need to conquer Red Dead Redemption 2. [online] Available at: https://www.redbull.com/gb-en/5-skills-you%27ll-need-to-conquer-red-dead-redemption-2 [Accessed 1 Mar. 2019].
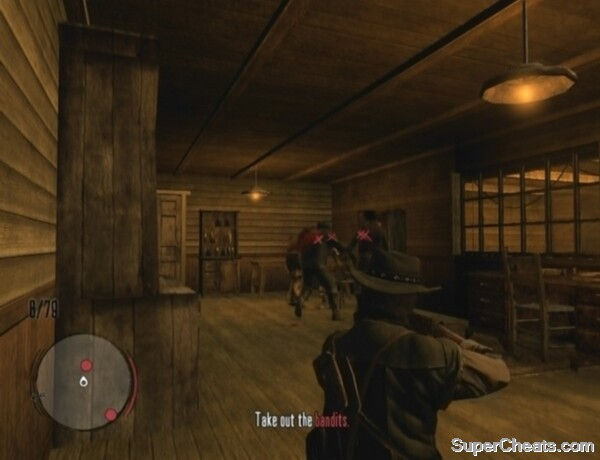
Interior RDR1: Supercheats.com. (2019). Irish's Missions - Red Dead Redemption Guide. [online] Available at: https://www.supercheats.com/guides/red-dead-redemption/irishs-missions [Accessed 1 Mar. 2019].
Interior RDR2: 80.lv. (2019). A scene from Red Dead Redemption remade in UE4 . [online] Available at: https://80.lv/articles/red-dead-redemption-ue4/ [Accessed 1 Mar. 2019].
Concept Art


Barrel: FeltMagnet. (2019). How to Draw a Wooden Barrel. [online] Available at: https://feltmagnet.com/drawing/How-to-draw-a-barrel [Accessed 1 Mar. 2019].
Building: Rexdixon.com. (2019). Wooden Warehouse | Wooden Thing. [online] Available at: https://www.rexdixon.com/topic/wooden-warehouse [Accessed 1 Mar. 2019].


Here is the Concept art I have done for the project, here you can see the process I have taken to create the concept. I started by drawing the outline of the building I then added the doors/windows After I added the wood panels and started to colour the building once I was happy with the look I started to draw the barrels to fill in the gaps, then I coloured the floor to look like concrete. I decided on the cast of the shadow during the drawing so that I could work with the contrast of colours better.
Textures


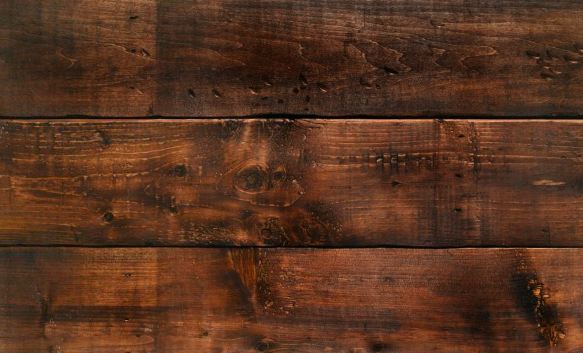
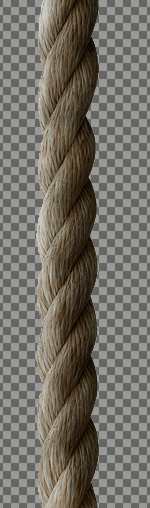
when creating the textures I used Photoshop and Gimp to alter the image by either brightening, sharpening or burning the image to give it the effect that it had been worn by time and weather. I then brought it into a programme called Materialized to come up the images above they have Diffuse, Hight, Normal, Metallic, Smoothness and AO Maps. These textures didn't fit the Modular aspect of this project and you could see that it tiled rather poorly so these textures haven't been used in the final project. There are more images which you can see in the gallery below of all the textures I edited and created but when talking to Eoin we both agreed that it would be better if we found better quality textures or at the very least textures that tiled well without being too obvious.
Rejected textures


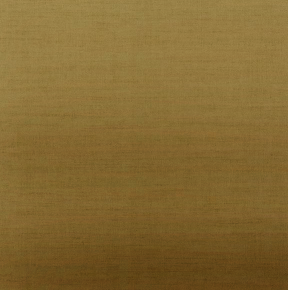


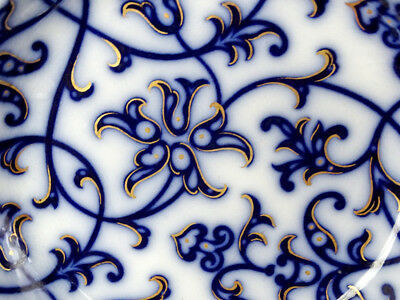


Here are some of the rejected textures that we went through and decided on scrapping due to the reason of the textures not tiling nicely or they didn't suit the style that we wanted, a lot of these textures I had to do at home with no assets to reference at the time. I also tried creating my own ceramic texture to go onto a teapot, teacups and saucers, I used the ceramic picture that you can see in the gallery, and tried to do my own version and make it tileable which I was unable to do at this point in time.
Press Texture Maps to view the whole library.
Audio
Here is a playlist of the audio a colleague made for this project. the file in this is really well done but unfortunately, we were unable to use a lot of the die to a few factors such as multiple styles of the same audio style such as walking, waves etc. we also had rat squeaks audio, but due to a colleague unable to animate the rat we weren't able to use the audio of the model of the rat which is a shame because the audio and model were really well created.
Asset Creation


.png)


.png)


.png)

.png)


these are most of the assets that have been created throughout the project. Everyone involved in this project has created at least one asset to put into the final piece, a lot of the assets had to be modified with either the wireframe being a mess and because of that, it added a lot of unnecessary polys and it also affected the texturing process. With my job being sourcing textures it was my duty to find the textures to suit the style we were going for but for it to also suit the asset which was harder than I expected then give it to my colleagues to add the texture to the asset. Unfortunately only one of my colleagues did this with others claiming they were either to busy doing something else or they didn't know how to do it, even after being showed they didn't start texturing so myself and another colleague was forced to fix any broken models and texture them which slowed down the process of what we needed to do ourselves. Below are some of the assets we had to fix and texture. Barrels, Ropes, Door and hay bale just needed texturing the rest and more which I haven't been able to add had to be modified in one way or another.


Technical
In this video, I was learning how to make a building using Geometry blocks within the Unreal Engine programme. I initially started by putting basic walls to create the basics of the building. but I was unable to put pillars between the wall and roof to make high windows in the scene, I was then told that if I used geometry blocks it would be more responsive in what I wanted. After finishing the layout I wanted, I add props that came with Unreal Engine to make it look like a functional room, I also played around with the textures that came with the programme. I am extremely happy with how it came out as this is the first time I've used this programme other than an hour lesson when I went to the university centre Weston (UCW).
I learned how to animate an event in Unreal Engine. as you can see by the video I used a key, doorframe and door static meshes, I then added blueprints for the key and door. I followed the tutorial that was provided to the class which showed me how I need to set up the blueprints to make it so that when I walked into key it would trigger the door to open. The only problem is that there was still a collision box so I couldn't walk through the door, to fix this I went into the meshes properties and under the collision tab, it has an option to remove the collision box. I didn't think it would work as well as it did.

Here is the menu screen we were trying to implement into our level, this is an updated menu as the old menu didn't work when we tried to attach it to the level so we tried to make one that would work and we got to the point that this picture would show but when you pressed start it would change to the player camera.
Group chat: Discord


This is some screen caps of the Discord server where our group was meant to put our files and to update each other on what we had to do or have done. Unfortunately, some people didn't bother uploading regularly on the server, so we were only able to get updates during the three days we were at college.
Here is a video of the level my group has designed and put together, it gives you a demonstration of the level. this rundown lets you see key elements of the level such as the assets triggered events and the key collectable. and below is the link to the download file.