
3DS Max Interface
3DS Max Q&A
Castle
What does industry standard software mean?
It means that it is the standard software used within most if not all major/minor companies.
Research examples of games that have content made with 3Ds Max and list as many as you can within 2 minutes?
3DS Max was used in the making of games such as:
- Uncharted 4: A Thief's End
- Dead By Daylight
- Dragon Age: Inquisition
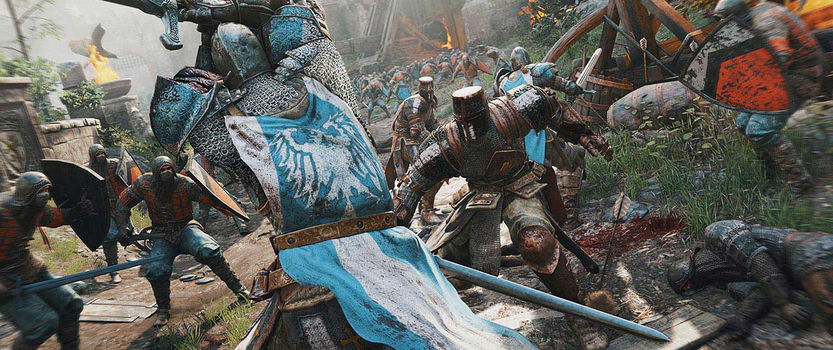
- For Honor
- Ratchet and Clank
- Mirrors Edge
- Call of Duty: Black Ops 3
- Watchdogs 2
- Halo Wars 2
- Dues Ex: Mankind Divided
- EVE: Valkyrie
- Edge of Nowhere
Below are a few pictures I found of a couple of the games I have listed above to help visualise the detail gone into the games and what can be made using the 3DS Max software.
Find 2 alternative products made by Autodesk and list their names and briefly describe what they do.
Maya: Maya is a 3D modelling programme which allows motion effect and animation. Maya also incorporates laws of physics to make sure that the behaviour of the objects being created looks more lifelike than has been previously attempted with other products.
Autocad: is a 2D and 3D computer aide which is a drafting software application that is largely used in architecture, construction and manufacturing to assist with blueprint and engineering plans and production.
What is the difference between surface modelling and solid modelling?
Surface modelling: is used to make items such as torches, cars, guns etc look nice but grammatically correct in size, mechanics etc.
Solid modelling: is a mathematical technique for representing solid object that is unlike wireframe or surface modelling. it allows the systems to ensure that all surfaces meet properly and that the product is geometrically correct which is essential for manufactures.

I am happy with the castle at the moment; but I would like to add more details and highlights and shadows on and around the structure. But as a first attempt I have to say that i did not expect to get this far.
this is the first time I have used 3DS Max and and looking forward to learning and improving my skills with this product.
shortcuts i have learnt are
W - changing vertex's of asset (X, Y, Z)
E - rotation of asset (X, Y, Z)
R - scale of asset (X, Y, Z)
alt+middle mouse button - rotation of camera view
middle mouse button - move the camera vertex's

Editable Polygons.

I feel that this asset has more details in the backboard and the legs of the chair are more lifelike and would fit better We learned about editable polygons today. the basic is you use a primitive shape such as a box as seen in the picture. then you convert it to an editable poly and then you can use bevel, extrude, bridge and inset to edit the primitive shape to a different extent to fit within a gaming scene.
Chair.
With the first attempt at making chairs I only used primitive shapes I feel I need to reference images and add more detail to my assets such as screws and a more detailed backboard.I researched how to add the wood texture via auto desk tutorials.Attempt 2 was the asset I produced after I learned editable polygons, summitry and slicing.I feel that this asset has more details in the backboard and the legs of the chair are more lifelike and would fit better within a gaming scene.


Furniture.
I was tasked to make furniture using 3DS Max.
I created a wardrobe, chest of draws and a bed using Primitive shapes.
I then converting them to editable polygons to add little details like the bed having twisted legs and the feet of the chest of draws and wardrobe(done by using bevel once sliced), I also added draw fronts to the chest of draws and an opening down the wardrobe(done by carefully using the slice tool to then bevel inwards to make a little opening).
I then adding textures such as wood and aluminium to make the assets look more realistic.
I could improve on this by adding more details to the assets such as:
- Screws
- Mirrored door
- oped a door/draw and have it look like its being used.
With more practise of 3DS Max I can make more detailed assets that could end up within an actual game.
planet mapping.

Creating my own maps.
Chess Pieces.

Lamp.

Today I learned how to add more detail to textures. To do this you need three different maps the first is your typical diffuse map which adds the main texture to the asset. the second being a bump map which adds the details such as groves, wrinkles, scratches etc. and finally there is the specular map which adds shininess to the map highlighting colours. To do this you need to open up the material editor (shortcut: M) scroll down to the maps tab and add the diffuse map to the diffuse tab, bump map to the bump tab and the specular map to the specular level tab. then change the parameters to the bump and spec map. I raised my bump map to 250 and lowered my spec map to 25 to get the detail you see to the right.
Diffuse map Specular map
Bump map
this is what it looks like when all three maps added together
I was tasked to create a lamp using the reference picture shown. I did this after missing the lesson so I had no idea what I was doing other than a quick 5-minute explanation. as you can see It somewhat looks like the reference picture, but the top arch on my lamp is not as rounded as the reference picture and I have a lip at the head of my lamp whereas the reference picture is really smooth. Overall I am happy with how the design looks but I do feel I need to practice splines more to understand them better.

As i missed the lesson due to family circumstances I struggled a lot trying to make this, as i was following the tutorial on the E-study website which i have found out was for a previous version of 3DS Max. after Frazer explained a different way draw splines during my second Isometric room I understood it easily and created the Chess board and Chess set minus the Knights as i don't have the skill level at the moment to do it. I have made it look like thy're in a match which i did by actually starting a match with myself to make it look as realistic as possible. As you can see the edge of the chess board hasn't chamfered properly which i actually kind of like as it adds a bit of personalisation to this asset. Once i develop my skills I will be adding the knights to this asset.
I learned about how to add textures to planes which is rather simple considering I've added textures to more complex assets as seen above and below this entry. But it was useful to learn how to properly use certain aspects of mapping such as using diffuse colour to get the right type of map instead of trial and error attempts. But after being shown how to map the textures to create a detailed crate which started with creating a box then unmapping the box and saving it as a PNG file I then had to open photoshop and put the texture to match the size of the box, I then change the bit rate to 8 bit and then save it as a Targa file to then add it to then add it to a diffuse map. after that, I used the used the same PNG file and then adjusted the contrast levels as seen below to make it Greyscale which then saved as a Targa file once again but I then put it in the bump map space instead of the diffuse map, lastly I did the same thing but added the white dots as you can see below which is a way to add details to metal for this project screws saved and added as a specular map. which created the box that you can see below.


Creating my own maps.
Today i was tasked to create a cereal box using the techniques we learnt unmapping skills I learnt above. I thought i done it properly but have noticed that the file i save to then remap onto a box has cut off the "Crac" part of Cracker Jack as you can see in the unmapped box to the right, next time i do this i will ensure i take more time to check that everything is correct.


